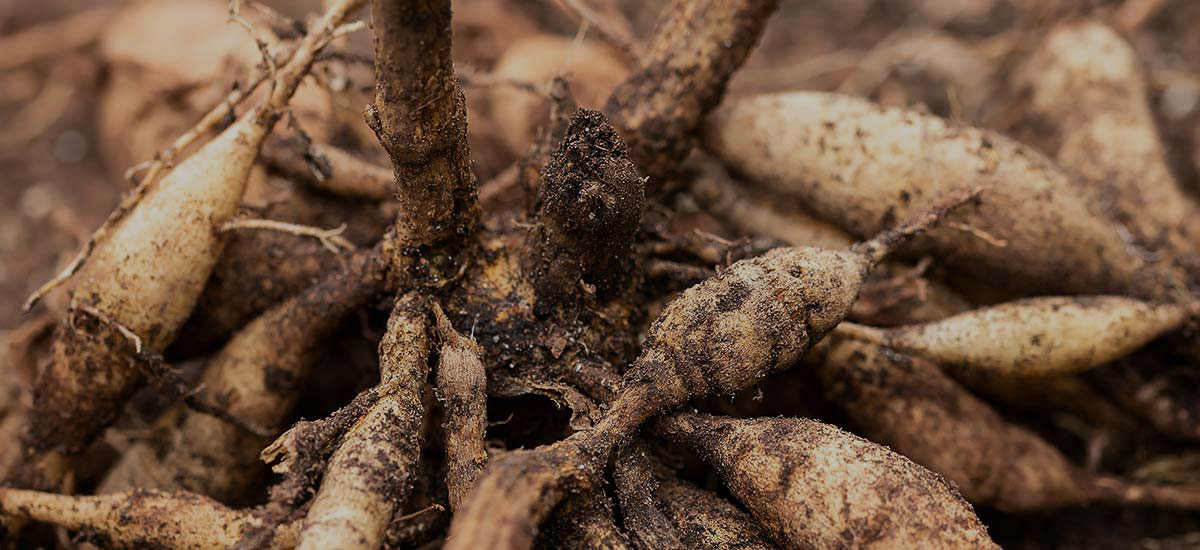
In most parts of the country, dahlia tubers need to be lifted from the ground, cleaned, labeled, and stored for the next season. Lift your tubers soon after the killing frost or any time after 120 days after planting. (In warm climates, some growers leave their tubers in the ground and lift and divide in spring.)
Here’s how to lift your tubers.
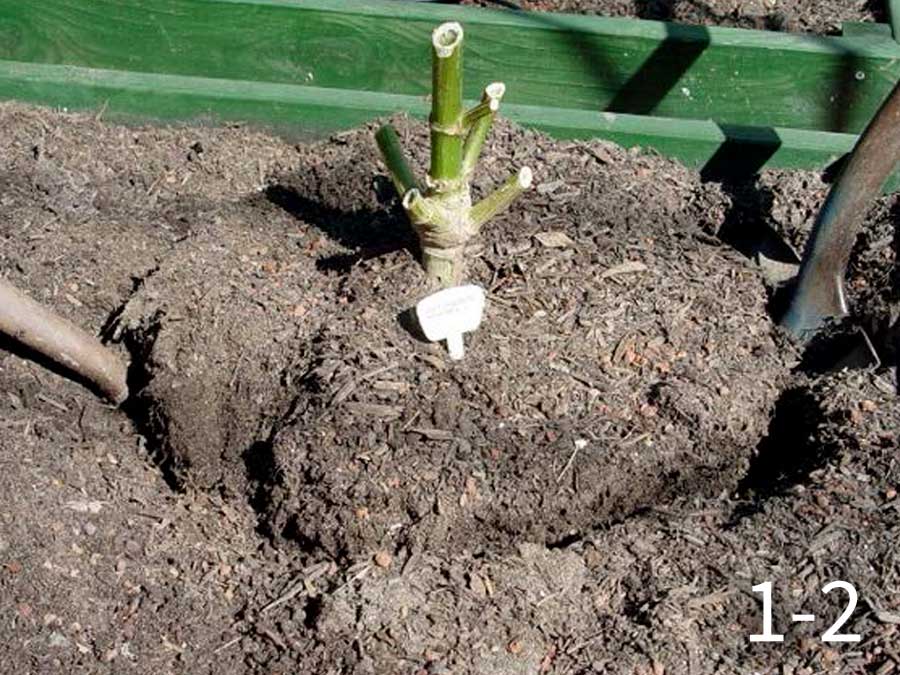
After a killing frost or about 7-14 days before you want to lift your tubers, cut the plant down to about 6 inches (image 1-2). If you expect heavy rain, you may want to cover the top of the remaining stem with aluminum foil so as not to let too much moisture enter the stem. If your ground is saturated, you may want to lift sooner rather than later.
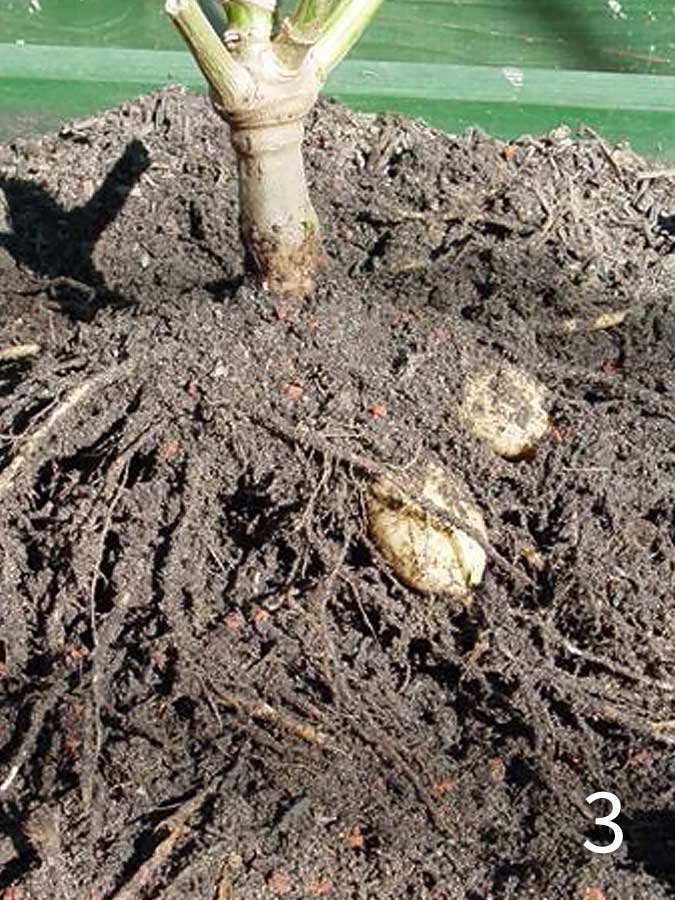
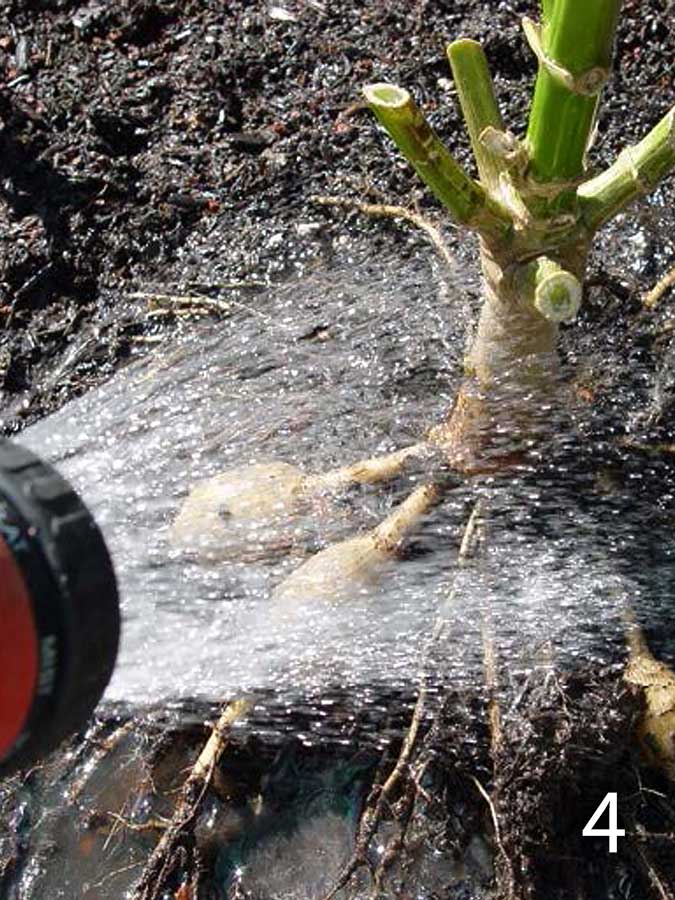
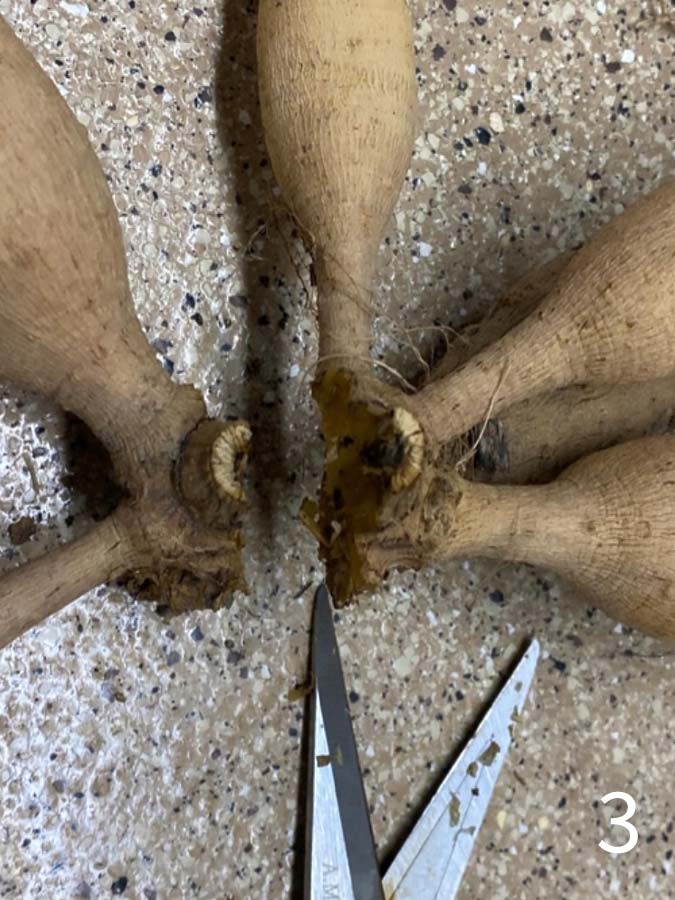
On lifting day, start to lift the tubers which you expect to be in the ground, by digging a circle around the clump about 18” out from the center stem (image 1-2). Gently maneuver your shovel under the clump until you can lift the clump. You may want to do this step with a pitchfork. Gentle is the key word. Be sure to keep the label with the clump. Gently brush off the soil clinging to the clump, or if needed, rinse as much soil off the clump as possible and set aside to dry (images 3 & 4). Setting the clumps on a tarp works great. If you set them in the sun, do so only for a short time. Move to a safe, dry, covered location. If you put the clumps in a garage, do not put them on a concrete floor. It will suck all the moisture out of them.
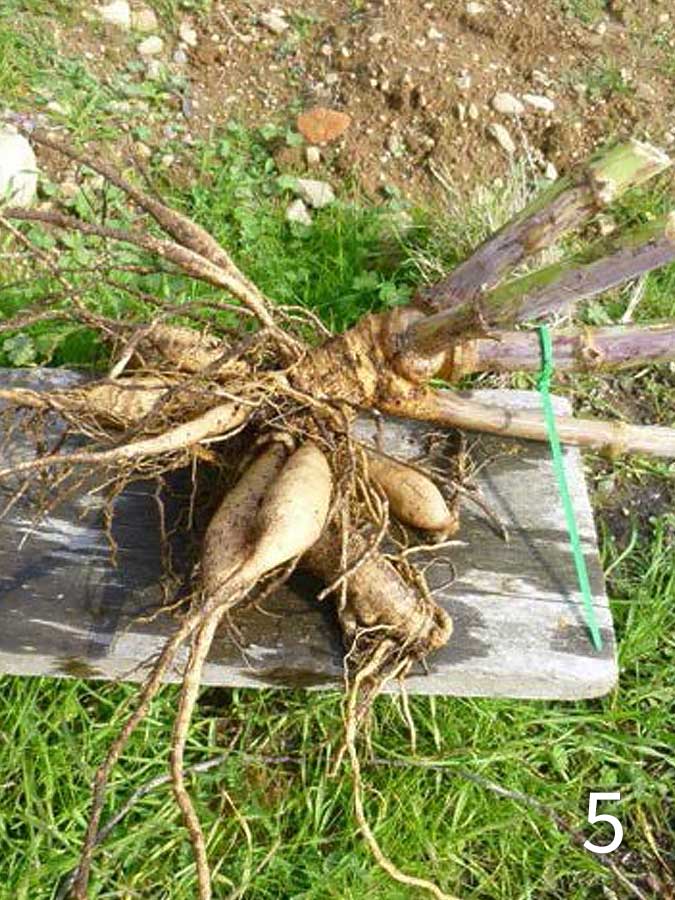
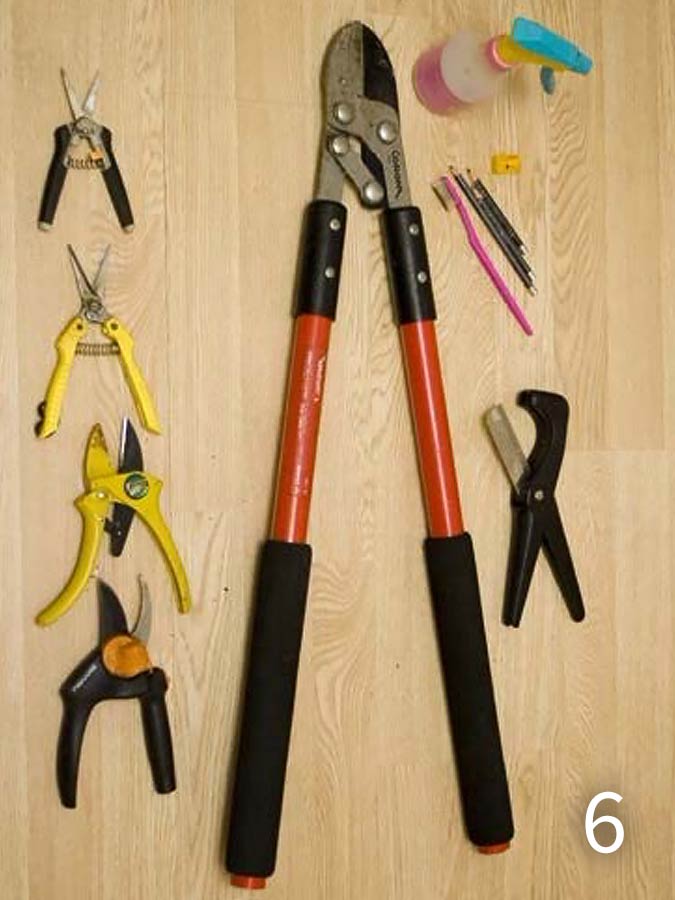
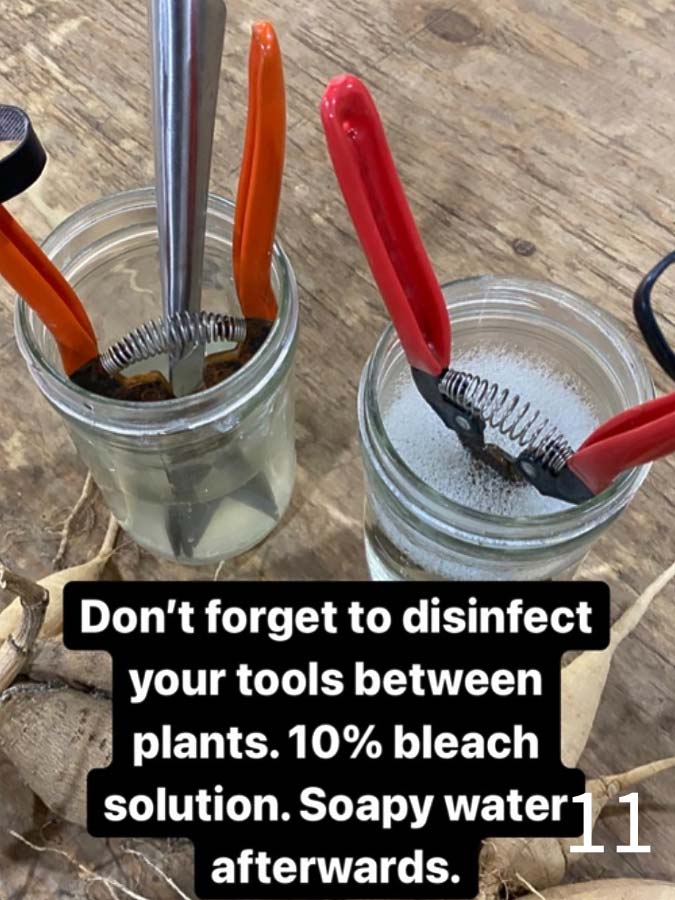
While the tubers are drying, prepare for dividing (image 5). Gather your cutting tools – a strong lopper, pointed clipper, hand pruner, etc. If you do not have hand strength, consider a knife and a cutting board. You will be able to use leverage using a knife. Or try an electric plunge cutter. Be sure your tools are sterilized with a 10% bleach to water solution now and between each clump.
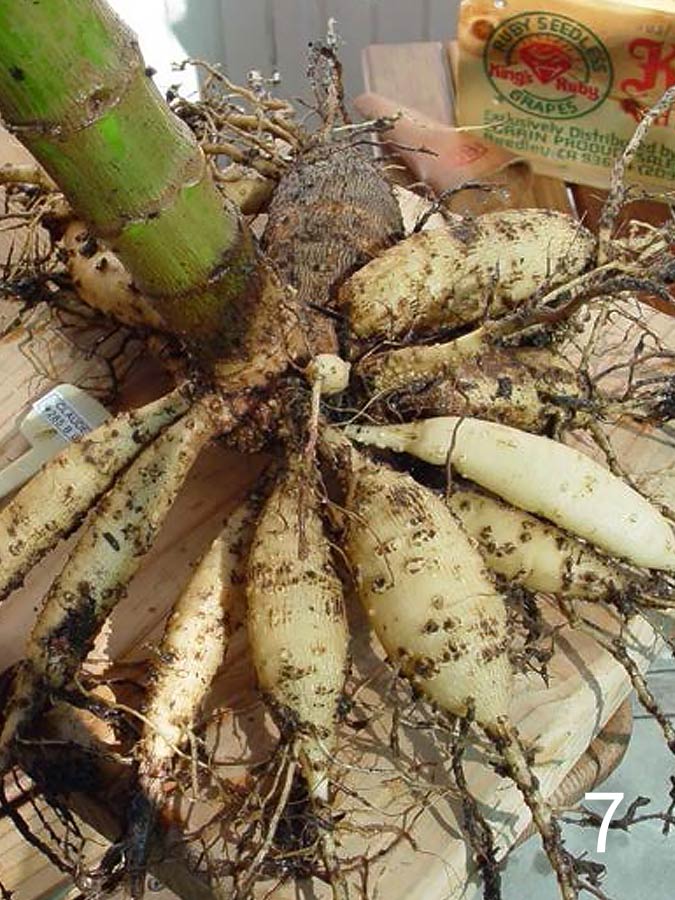

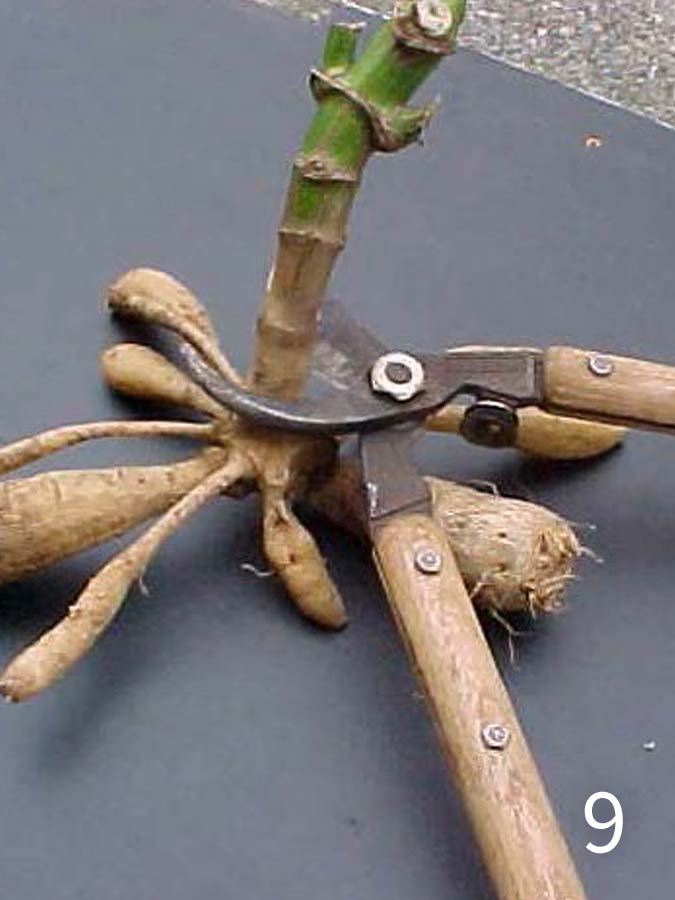
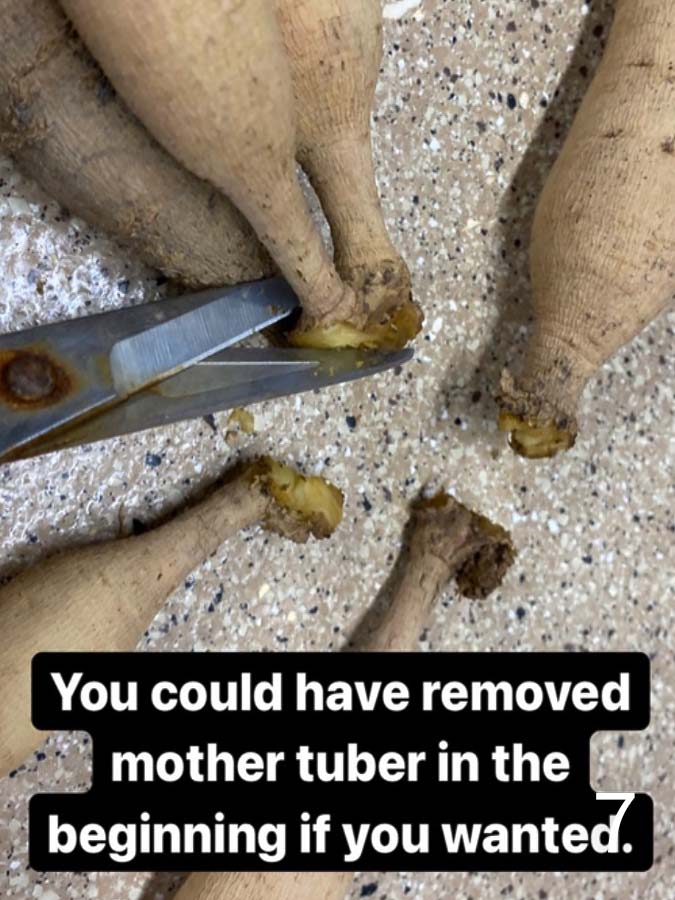
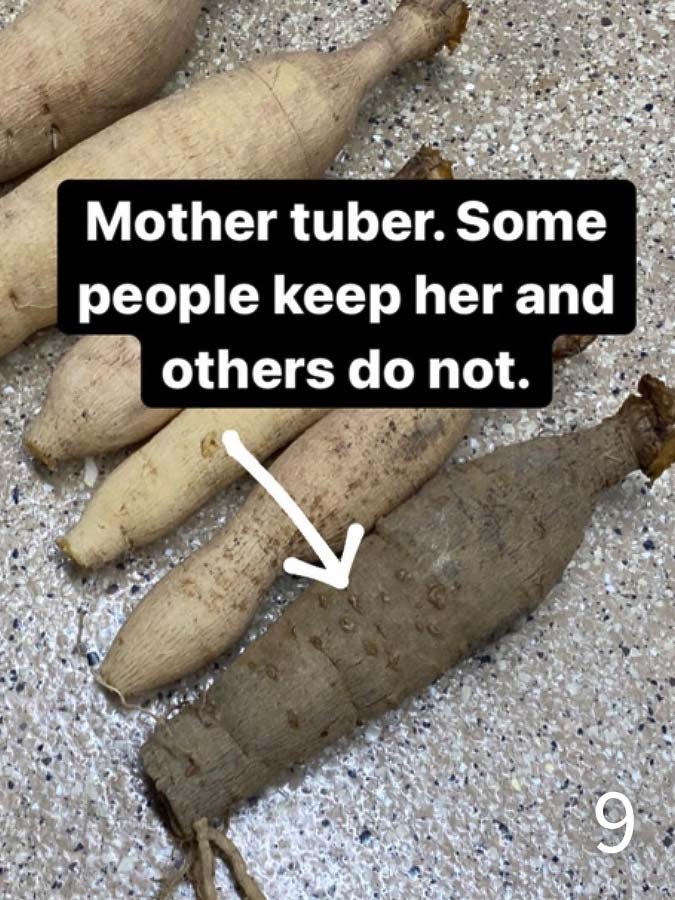
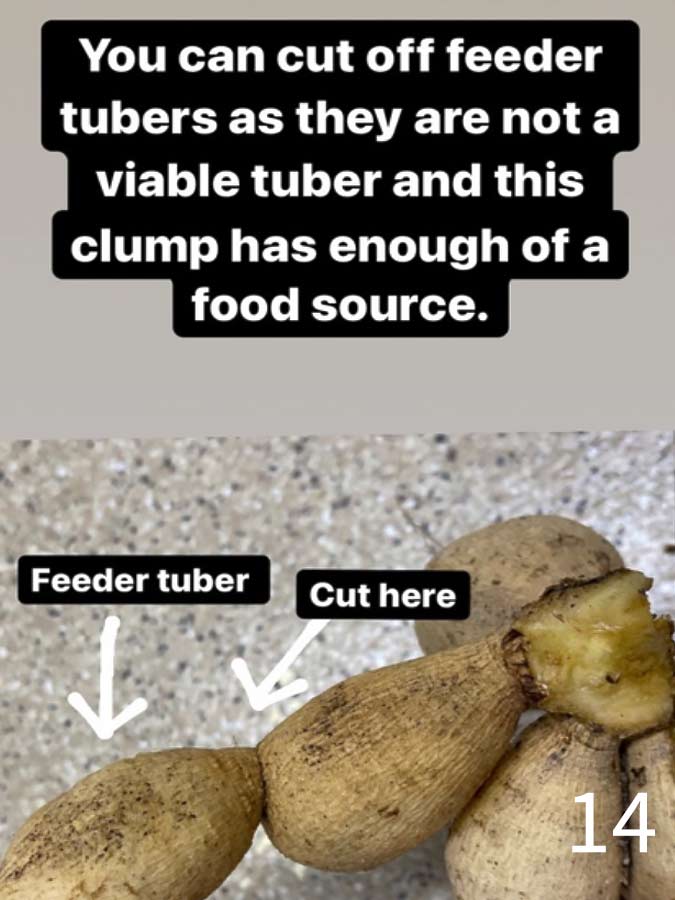
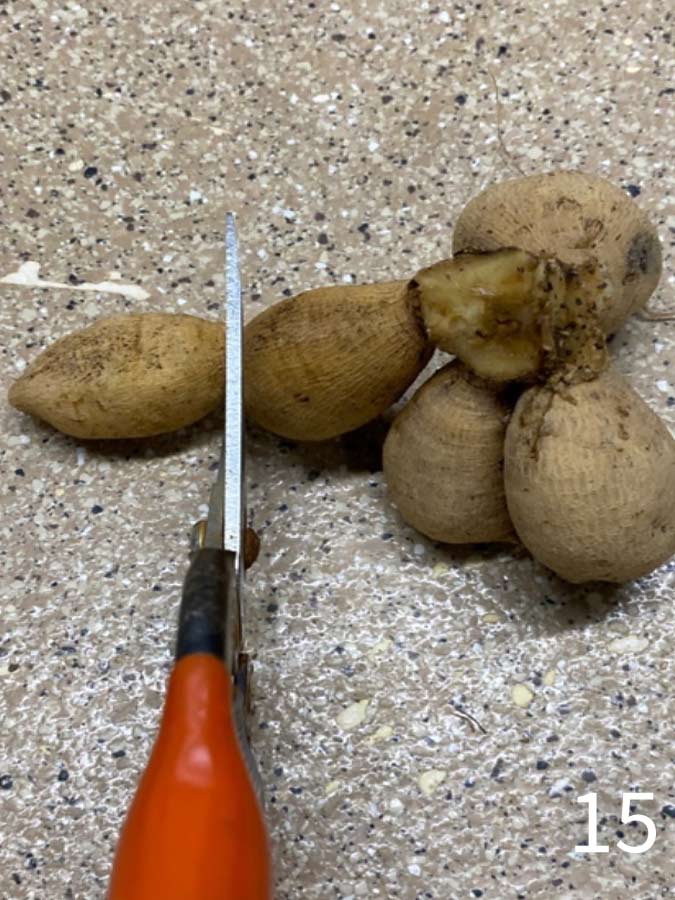
Process each clump. Cut off the little roots at the end of the tubers. Cut off any spindly or damaged tubers. Cut off this year’s mother tuber if it is still part of the clump (image 7, 8). Cut the 6 inch stem down to just above the clump (image 9). If the clump is large, cut down vertically through the stem twice (one cut east-west, the other north-south), making four mini clumps. Be sure to keep a label with each mini clump. Clean away soil that may still be clinging to the tubers.
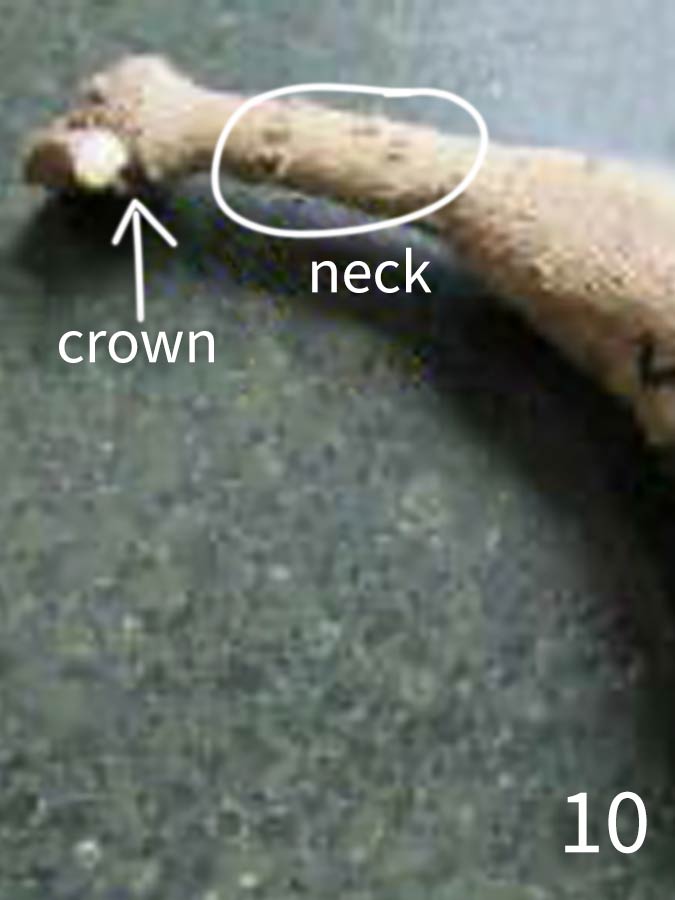
Observe each clump/mini-clump and identify the crown of each tuber. It will be right up by the stem. You may see some “eyes” (like on a potato) on the crown, but if not, know that right on the crown is the only place that an “eye” will develop. The “eye” is the beginning of next year’s plant (image 10).
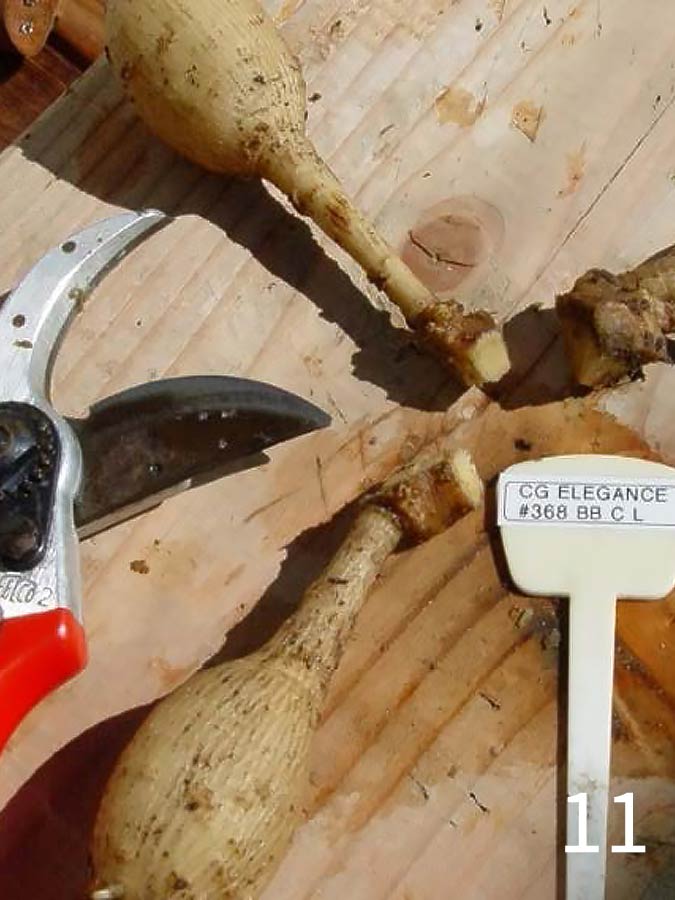
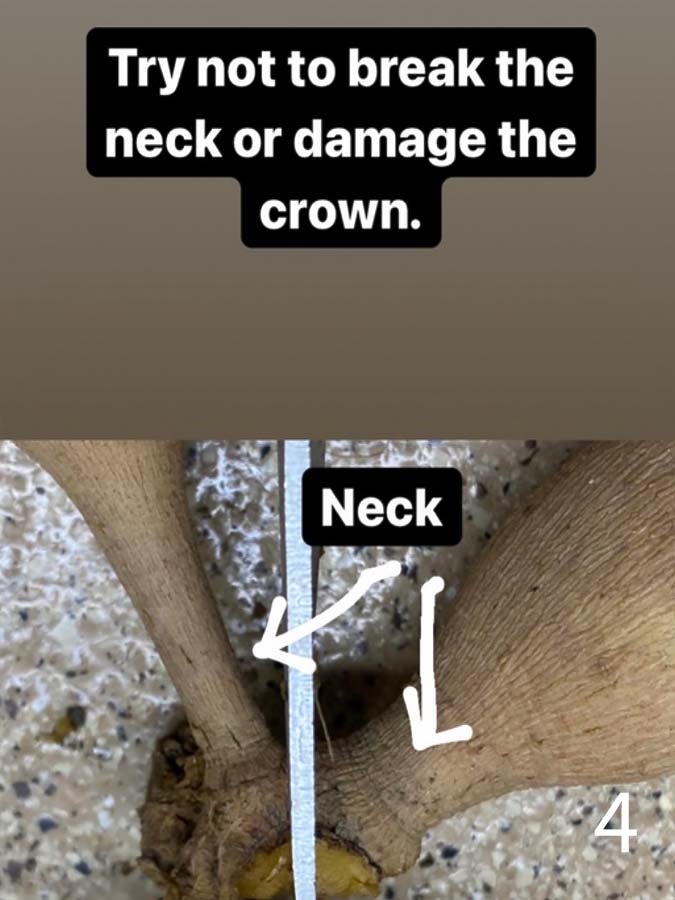
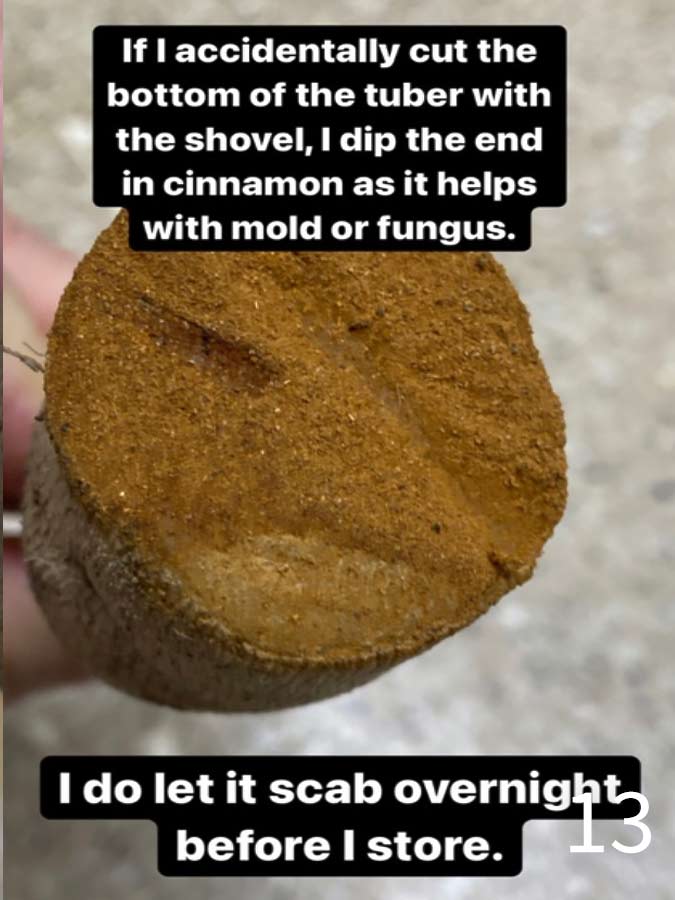
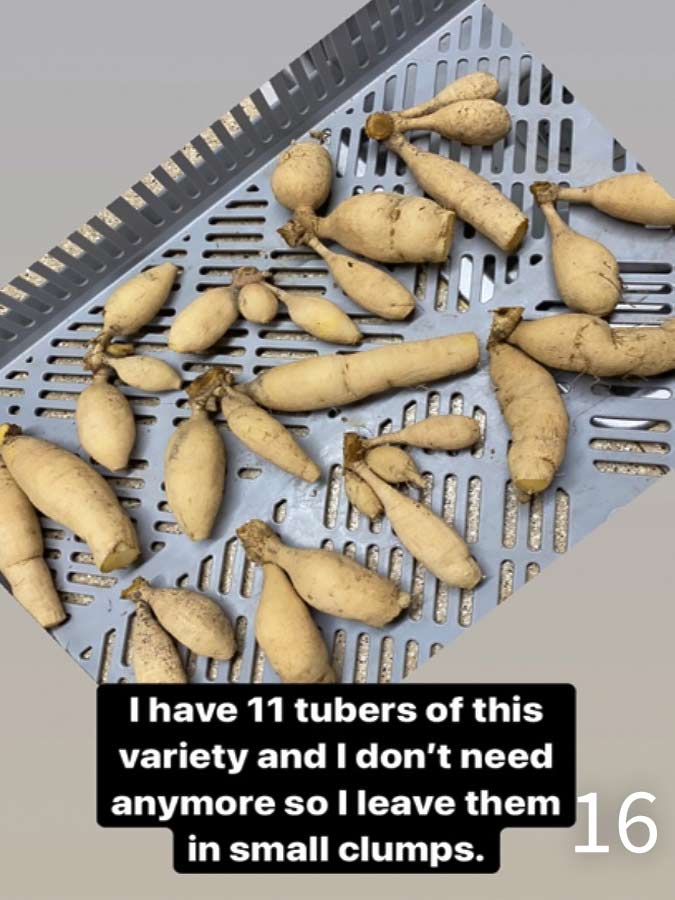
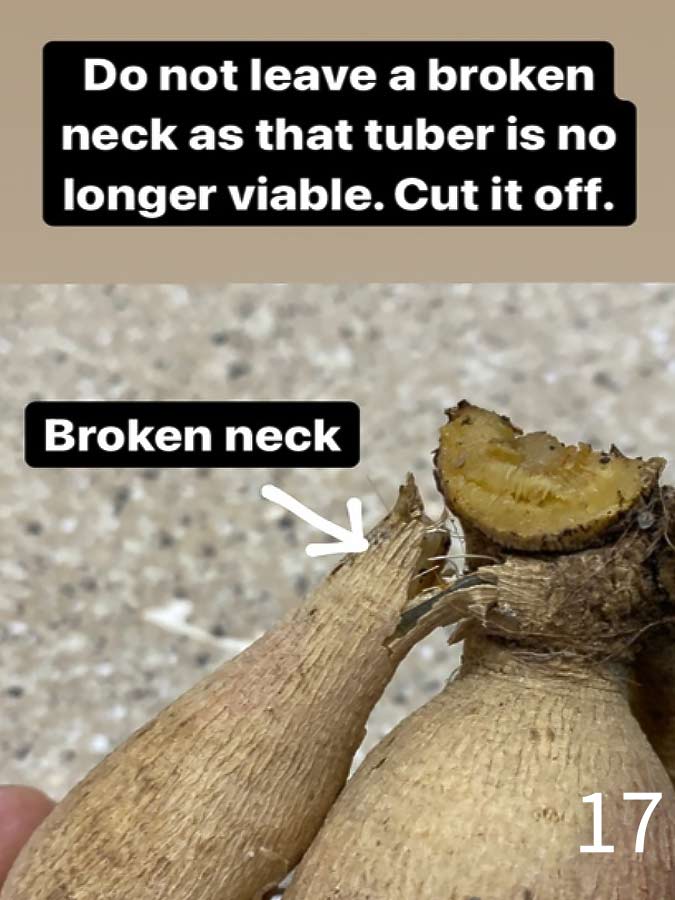
Cut the clump/mini clump into individual tubers (image 11) being sure to have at least most of the crown of the tuber intact with a bit of the stem. If the neck of the tuber is broken, throw the tuber away. You might want to dust the cuts with cinnamon – for its fungicide and root boosting properties. You can write the name of the cultivar on the individual tubers if you wish, or assign a number to each variety, write the number on the tuber and keep a list/legend. Don’t lose the list/legend!
Once the tubers are cut apart they need to be stored correctly. There are about as many methods for storing tubers as there are growers.
Some like to wrap each tuber in plastic wrap. (See Dahlia University at dahlia.org for an article devoted to this method.) Or you can put the tubers in paper bags with vermiculite, peat moss, paper or wood shavings or the like. This method may allow the tubers to dry out. This author puts the tubers in a plastic grocery bag with about 2 cups vermiculite (large size if possible, less dust), puts a label in the bag and writes the name on the bag. Then she folds the grocery bag over and stacks the bags in a large plastic tub. If you have a lot of tubers of the same name, split them into two bags. Then if one bag has problems (like rot), maybe the other one won’t. Put a screen over the top of the tub to allow air flow, but no mice! Store the tubs in a cool place ideally 40-50 degrees. DO NOT LET THE TUBERS FREEZE.
ADS Dahlia University
Putting Your Dahlias Down for a Long Winter’s Nap
Republished with permission from the American Dahlia Society.
© American Dahlia Society, all rights reserved.
Thanks to Linda Holmes-Cook, Claudia Biggs, Ron Miner, and Bob Schroeder for the above photos.
Photo Gallery — Cutting Dahlia Tubers
By Paula Fisher, Garden Bee Flower Farm


